




TripMemo Product Team
Product & releases
8 min read•Published
Summary
There are three good ways to put a travel map in a photo book. Let the photo book studio draw the route from the locations saved in your photos; make a map image with a mapping tool and add it as a page; or photograph or scan a paper map you marked up on the trip. Put the main map on the opening page, give long trips a smaller map at the start of each chapter, and export any map image at least 2,400 pixels on its long side so it prints sharp on a full page.
There are three good ways to put a route map in a travel photo book: let the photo book studio draw it from the locations saved in your photos, make a map image with a mapping tool and add it as a page, or photograph a paper map you marked up on the trip. The first takes a few seconds and the third has the most character. Whichever you choose, put the main map on the opening page so the reader sees the whole journey before the first photo.
This guide covers how to make each kind of map, where to place it, how large to export it so it prints sharp, and why maps sometimes miss stops. If you are making a book of a drive, our road trip photo books open with a route map page drawn from your photos.
Why a Travel Photo Book Needs a Map
A trip is a line across a map, but photos are dots. Without a map, a reader turning the pages of a two-week trip has no idea whether the lake on page 30 was before or after the city on page 12, or how far apart they were. A map page answers that in one look, and it gives the book a beginning: here is where we went, now here is what we saw.
Maps matter most for trips that move: road trips, rail journeys, island hopping, multi-city flights and long hikes. A week in one beach resort needs one at most.
Way 1: Let the Studio Draw It From Your Photos
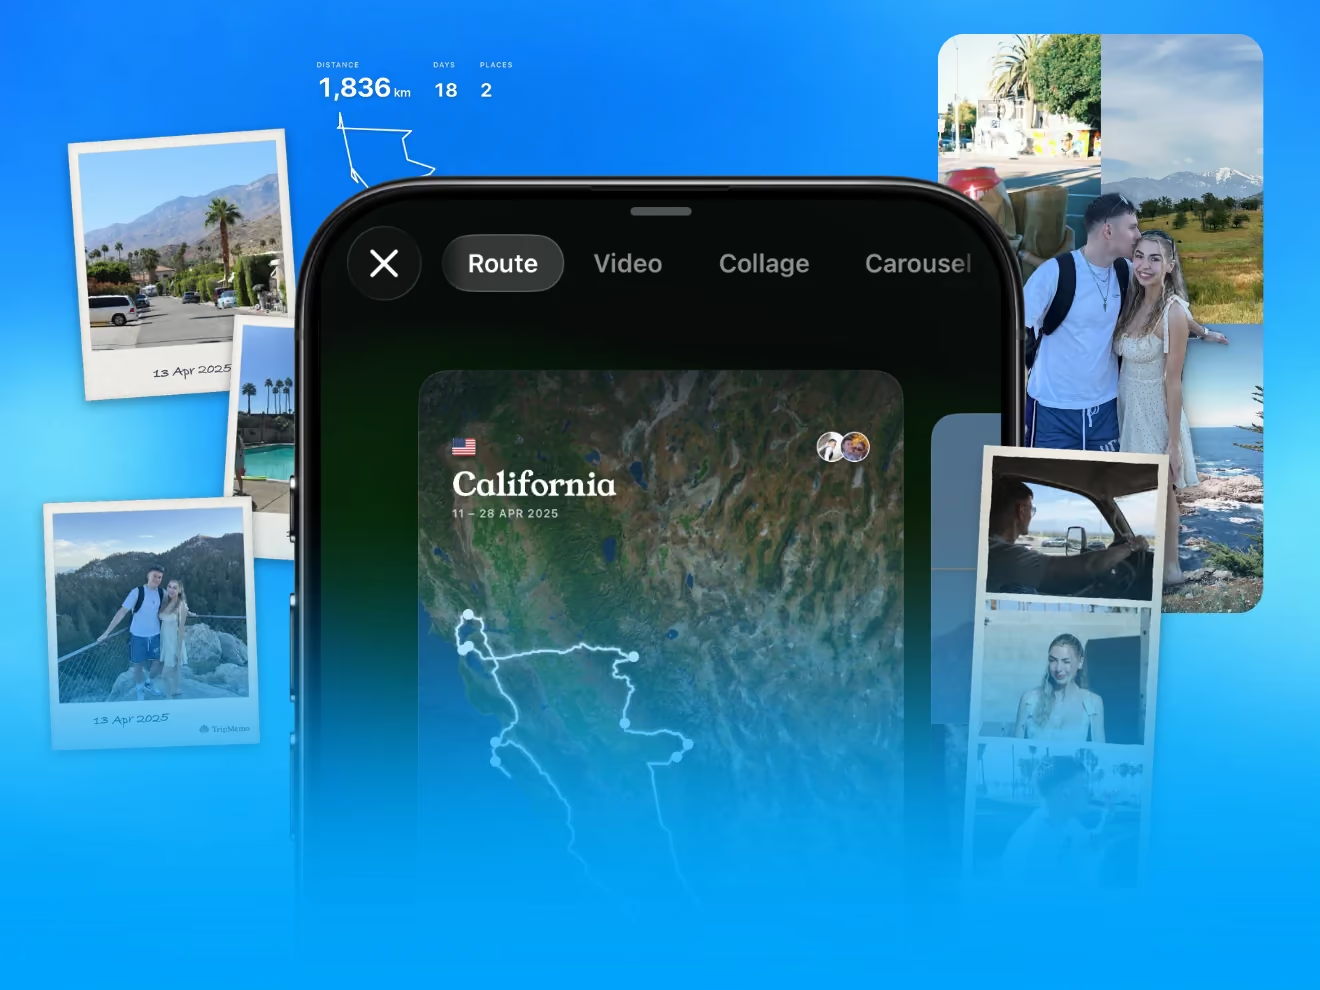
Most phone photos save the place they were taken. A photo book studio can read those locations and draw the route for you.
In TripMemo's photo book studio, the Route map switch adds a title page that maps where you went, drawn from the locations in your photos. Books made from a trip recorded in the TripMemo app on iPhone use the route you recorded instead, on a satellite map.
To get the most accurate map from your photos:
- Use the originals from your camera roll. Photos sent through some messaging apps lose their location on the way, and screenshots never had one.
- Check your photos have locations before you start. On an iPhone, open a photo in Photos and swipe up: if a small map appears, the location is saved. Our travel photo map generator is a free browser tool that plots a folder of photos on a map without uploading them, which shows quickly which days are missing.
- Add photos from everyone's phone. If location services were off on your phone for a day, a friend's photos from that day fill the gap.
Way 2: Make a Map Image and Add It as a Page
If you want a particular look, labels on every stop, or a map of a trip whose photos have no locations, make the map yourself and add it to the book like any other photo.
- Flights between cities. Our flight route map generator is a free browser tool that draws up to eight stops as curved flight paths and downloads the map as a PNG image.
- A drive or a rail journey. Plot the stops in a mapping app that lets you build a custom map with your own pins and lines, then screenshot or export it. Turn off any layers you do not need (traffic, businesses, terrain shading) so the route stands out.
- A hike or a cycle tour. Activity apps that recorded the route can usually show it full screen on a clean map. Screenshot it, or export the route and open it in a mapping app.
Keep the design simple. One route line in one strong colour, a dot and a short label for each stop, and plenty of empty space reads better in print than a busy map with every road named. Matching the line colour to your cover ties the map to the rest of the book. Keep the attribution text that map services print in the corner of the map.
How large to export a map image
Thin lines and small labels are the first things to blur in print, so maps need more pixels than photos do.
| Map size in the book | Export at least (long side) |
|---|---|
| Full page, A4 portrait or 21 × 21 cm square | 2,400 pixels |
| Half a page | 1,600 pixels |
| A small inset beside photos | 1,000 pixels |
Those figures work out at about 200 pixels per inch, a safe minimum for print. A full-screen screenshot from a recent phone is about 2,400 to 2,900 pixels on its long side, so a full-screen screenshot can fill a page; a cropped corner of one cannot. Zoom the map in until the route fills the screen before you take it.
Join the TripMemo
Newsletter
Unsubscribe anytime. Read our privacy policy.
Way 3: Photograph or Scan a Paper Map
The most personal map in a travel book is often the one you carried. A road atlas with the route traced in pen, a rail map with stations circled, a ferry timetable, a hiking map with a coffee ring on it, or a route sketched on a napkin in a bar all make better pages than a perfect digital map, because they are part of the trip.
- Scan it if you can. A flatbed scanner or a scanning app gives a flat, evenly lit image. Phone scanning apps correct the angle and flatten the page.
- Or photograph it in daylight. Lay it flat by a window, shoot from directly above, and fill the frame. Avoid the flash, which leaves a bright spot on glossy paper.
- Draw your own. A simple hand-drawn route on plain paper, with the stops labelled in your handwriting, makes a charming opening page, especially in a book for a child or a gift.
Planning ahead helps: pick up a paper map at each stop and mark the route as you go. Our road trip journaling guide has more on what to collect on the road.
Your trip, printed.Start it in the TripMemo app.

Where to Put the Map in the Book
The opening page or first spread. This is where readers expect the map, and it frames everything after it. Put the trip title and dates beside it.
Chapter openers for long trips. For a trip through several regions or countries, give each chapter a smaller map of that stretch, with the main map at the start showing the whole route. A three-week trip through four countries reads far more easily this way.
The last page. A map at the end works as a summary: the full route with the total distance, the number of stops and the dates. Some people put the planned route at the front and the route they actually took at the back.
Our guide to making a travel photo book covers the order of the rest of the pages, from the title to the last photo.
Details That Make a Map Page Better
- Number the stops in the order you visited them, and use the same numbers in the captions later in the book.
- Add dates under each stop, or the number of nights you stayed.
- Write the distance. "1,836 miles in 14 days" says something about a trip that no photo can.
- Mark the highlights, with a small star for the best meal, the best view or the place you would go back to.
- Pair the map with one photo. A wide photo of the road, the train or the trail on the facing page makes a strong first spread.
Frequently Asked Questions
How do I add a map to a photo book?
Let the studio draw it, or add a map as an image. In TripMemo's studio, switch on the route map and the book opens with a title page mapping where you went. Any other map goes in like a photo, on a page of its own.
Where should the map go in a travel photo book?
On the opening page or the first spread. For a long trip, add a smaller map at the start of each chapter.
What resolution does a map image need for a photo book?
At least 2,400 pixels on the long side for a full A4 page, and 1,600 for half a page. Thin lines and labels blur first, so export larger if you can.
Why is my photo book route map missing stops?
The map can only use photos that kept their location. Photos taken with location services off, screenshots and photos sent through some messaging apps have none, so use the originals from your camera roll.
Can I make a route map for a trip I took years ago?
Yes. Plot the stops in a mapping tool and export an image, or draw the route on a printed map and scan it.
Ready to make the book? A road trip photo book opens with your route and keeps every stop in the order you drove it.