




TripMemo Product Team
Product & releases
10 min read•Published
Summary
Put the trip's photos in one album in the Photos app, make sure the full-size originals are on your iPhone or can download from iCloud, then open a photo book maker in Safari or its app, choose the album in the photo picker and lay out the pages. The Photos app on iPhone cannot order a printed book itself, so the printing is done by a photo book service. Avoid screenshots and photos saved from chats, which are smaller copies.
To make a photo book from iPhone photos, put the trip's photos in one album in the Photos app, make sure the full-size originals are on your iPhone (or can download from iCloud), then open a photo book maker, choose that album in the photo picker and lay out the pages. The Photos app on iPhone cannot order a printed book itself, so the printing is done by a photo book service, in its app or in Safari. The one thing to avoid is printing small copies: screenshots and photos saved from chats look fine on a phone and soft on paper.
This guide covers the iPhone side of the job, with the menu paths from Apple's current iOS guides. We make TripMemo travel photo books, whose studio runs in Safari on an iPhone, so the examples use it, but every step before the last works with any photo book service. If you want the design side (how many pages, how to plan the story, what to write), our 9-step guide to making a travel photo book picks up where this one ends.
The Short Version
| Step | Where | What you do |
|---|---|---|
| 1. Gather the trip | Photos app | Make one album for the book |
| 2. Cut it down | Photos app | Remove duplicates, screenshots and bursts |
| 3. Check the originals | Settings | Make sure full-size photos can download from iCloud |
| 4. Collect other people's photos | Shared album or files | Ask for originals, not chat copies |
| 5. Add them to the book | Safari or an app | Choose the album in the photo picker |
| 6. Lay out and proof | The photo book studio | Check resolution warnings and every page |
1. Put the Trip in One Album
An album is the easiest way to hand a whole trip to a photo book maker, because the photo picker on iPhone lets you open an album and choose from it rather than scrolling through years of photos.
To create an album in the Photos app (these are the steps in Apple's iPhone User Guide for current iOS):
- Open Photos and tap Collections.
- Tap Albums, then tap the Add button.
- Tap New Album, name it (the trip and year works well, such as "Lisbon 2026"), add photos and choose a key photo.
- Tap Create.
To add more photos later from your library, tap Library, tap Select, tap the photos you want, tap the More button, tap Add To, then choose the album. Adding a photo to an album does not copy it, so it takes no extra space.
Tip: search inside your library for the place name or a date range to find the trip quickly. If you use iCloud Photos, the album also appears on your iPad and Mac, which helps if you want to finish the book on a bigger screen.
2. Cut the Album Down Before You Start
A photo book of 1,200 photos is a photo dump; a book people pick up again usually holds two or three photos for every page. Spend ten minutes on the album first:
- Remove screenshots, duplicates and bursts. Keep the sharpest shot of each moment.
- Keep the people as well as the views. The photos of who you were with are the ones you will be glad of later.
- Keep a few details: a menu, a ticket, a sign, the view from the room.
Our guide to how many photos go in a photo book has the numbers for every page count, and a calculator if you already know roughly how many pages you want.
3. Make Sure You Are Printing the Originals
This is the step most people skip, and the one that decides whether the printed photos are sharp.
iCloud Photos and Optimise Storage. If iCloud Photos is on and Optimise Storage is chosen, your iPhone keeps space-saving versions of older photos and stores the full-resolution originals in iCloud. Nothing is lost: when you pick a photo for a book, the iPhone downloads its original first. It does mean that adding older photos takes longer, especially on mobile data. Apple's path to the setting is Settings, then your name, then iCloud, then Photos (on iOS 27, then iPhone Storage). Leave it as it is; just use Wi-Fi when you add the photos.
Screenshots and chat copies. A screenshot of a photo is only as big as your screen, and photos saved from group chats are often shrunk to send faster. Print from the original in your library whenever you can.
How big is big enough? A standard 12-megapixel iPhone photo is 4032 × 3024 pixels. At 300 pixels per inch, a common target for photo printing, that is about 34 × 26 cm: larger than a full A4 page. Even a photo cropped to half its width prints well across most of a page. A good photo book studio checks this for you and warns when a photo is too small for the space you put it in.
HEIC or JPEG? iPhones save photos as HEIF (HEIC files) when High Efficiency is chosen in Settings, then Camera, then Formats, and as JPEG when Most Compatible is chosen. You usually do not need to change anything for a photo book: when you pick photos in Safari, iOS normally hands them over as full-size JPEG files, and TripMemo's studio accepts HEIC as well.


Join the TripMemo
Newsletter
Unsubscribe anytime. Read our privacy policy.
4. Collect Photos From Everyone Who Was There
Half the best photos of a family holiday or a group trip are on someone else's phone. Ask for them early, and ask for originals:
- A shared album. In Photos, tap Collections, scroll to Shared Albums and tap the Add button. From iOS 27, Shared Albums support full-resolution sharing, and people can join from a link, even without an Apple device. On earlier versions, shared albums hold smaller copies, so they are better for choosing photos than for printing them.
- AirDrop sends the original between iPhones nearby.
- A file link (iCloud Drive, Google Drive or similar) keeps the originals intact for people on Android.
Avoid collecting the book's photos through a group chat unless the app is set to send full-quality photos.
5. Add the Photos to Your Photo Book
Now open your photo book maker. On an iPhone you have two routes:
In Safari. A web studio uses the same photo picker as any iPhone app. In the TripMemo photo book studio, choose a cover, tap Add photos, then open your album in the picker, select the photos and tap the tick. Photos already on the iPhone arrive in seconds; photos stored only in iCloud download first, so a large album can take a little while. Keep Safari open until they have all arrived.
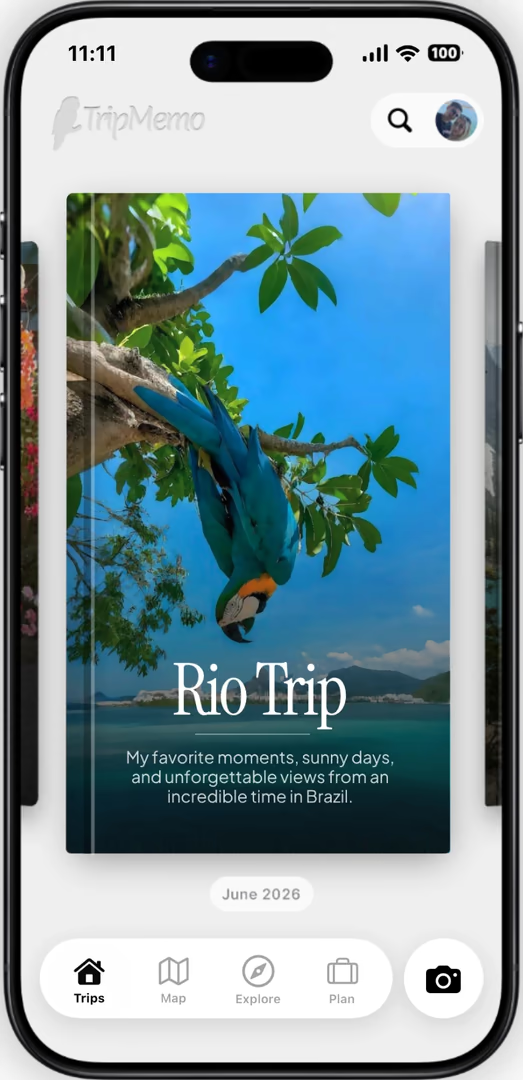
In an app. The TripMemo iPhone app sorts a trip's photos by day and place for you, and its books can be printed too. Other photo book services have their own iPhone apps, which work the same way through the photo picker.
Whichever you use, the book does not need to be finished in one sitting. A web studio lets you check the pages on a laptop later, which is easier for proofreading than a phone screen.




Your trip, printed.Start it in the TripMemo app.

6. Lay Out, Proof and Order
With the photos in, the rest is design. In the TripMemo studio you can put the photos in the order they were taken (it reads each photo's capture date), choose one to four photos per page, move, swap and crop each one, and add a title, captions and a spine. The studio flags any photo too small for the size it will print, so fix or swap those first.
Before you order, read every page once more, ideally on a bigger screen:
- Names and dates on the cover, the spine and inside.
- Faces near the edge of a page, where trimming can cut them.
- Duplicates that slipped through the album.
Choosing between bindings? Our comparison of layflat vs hardcover photo books covers which suits which trip, and the hardcover is the book most people choose.
Making a Photo Book on a Mac Instead
If your iPhone photos sync to a Mac through iCloud Photos, you can also make the book there. Apple does not print photo books itself. Photos for Mac can pass an album to third-party apps through File, then Create, which Apple calls Project Extensions, and any web-based photo book studio, including TripMemo's, works in a Mac browser. To use files from Photos in a web studio, choose File, then Export, and pick JPEG at full size.
Common Problems, Quickly Fixed
| Problem | Likely cause | Fix |
|---|---|---|
| Photos take a long time to add | Originals are in iCloud only | Use Wi-Fi and wait for every photo to arrive |
| A photo prints with a low-resolution warning | Screenshot, chat copy or heavy crop | Use the original from your library, or give it a smaller space |
| Photos are in the wrong order | Edited or received photos with missing dates | Reorder them by hand in the studio |
| The picker shows your whole library | You skipped the album | Open Albums in the picker, or make the album first |
| Someone else's photos look soft | Sent through a chat or an older shared album | Ask for the originals by AirDrop or a file link |
Ready to Print Your iPhone Photos?
Start with one trip and one album. Cut it to the photos you would show someone first, check they are the originals, and the book itself takes an evening. If it is a gift, check the Christmas photo book delivery dates before you start.
Frequently Asked Questions
Can you make a photo book in the Photos app on iPhone?
No. The Photos app on iPhone has no option to order a printed book. Collect the photos in an album there, then make the book in a photo book service's app or website.
Are iPhone photos good enough to print in a photo book?
Yes. A standard 12-megapixel iPhone photo is 4032 × 3024 pixels, about 34 × 26 cm at 300 pixels per inch. Use the original, not a screenshot or a chat copy.
Why does it take so long to add iPhone photos to a photo book?
Photos kept only in iCloud download at full size before they can be added. Photos already on the phone arrive in seconds, so use Wi-Fi for a large album.
Do I need to convert HEIC photos to JPEG for a photo book?
Usually not. Safari normally hands photos over as full-size JPEGs, and many studios, TripMemo's included, accept HEIC too.
How do I get photos from my family's iPhones into one book?
Use a shared album (full resolution from iOS 27), AirDrop or a file link. Avoid group chats, which often shrink photos.
Should I make the book on my iPhone or on a computer?
Either. Add the photos on the iPhone where they live, then check the pages on a bigger screen before you order.